


Hey there! As a supplier of right angle reducers, I've seen firsthand how crucial the installation position is for these nifty pieces of equipment. In this blog, I'll share some tips on how to optimize the installation position of a right angle reducer.
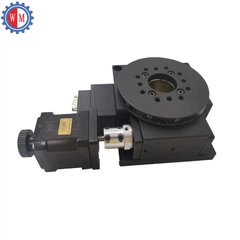
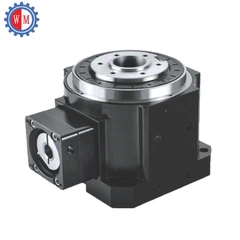
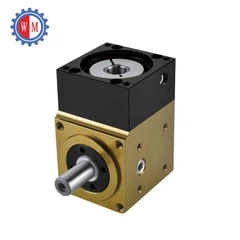
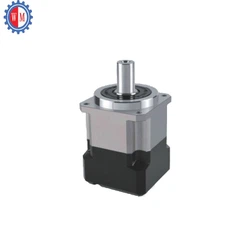
First off, let's talk about what a right angle reducer is. It's a mechanical device that changes the direction of power transmission by 90 degrees. They're used in a wide range of applications, from industrial machinery to automotive systems. There are different types, like the Gear Head Speed Reducer and the Hollow Solid Shaft Right Angle Reducer, each with its own unique features and uses.
Understanding the Basics of Installation Position
When it comes to installing a right angle reducer, the position matters big time. It can affect the performance, efficiency, and lifespan of the reducer. A poorly installed reducer can lead to issues like excessive wear and tear, noise, and even breakdowns.
The first thing to consider is the load requirements. You need to figure out how much torque and speed the reducer will need to handle. This will depend on the application it's being used for. For example, if it's in a heavy - duty industrial machine, it'll need to handle a much higher load compared to a small - scale consumer product.
Factors Affecting Installation Position
1. Space Constraints
One of the most common factors that influence the installation position is the available space. In some industrial settings, space can be really tight. You might have to install the reducer in a corner or in a small enclosure. In such cases, you need to make sure that there's enough room for proper ventilation. Reducers generate heat during operation, and if there's no proper ventilation, the heat can build up and damage the internal components.
You also need to consider the accessibility for maintenance. You don't want to install the reducer in a place where it's going to be a pain to reach when it needs servicing. So, think about how easy it will be to access the bolts, oil drains, and other parts that might need to be checked or replaced.
2. Alignment
Proper alignment is super important. The input and output shafts of the reducer need to be perfectly aligned with the shafts of the connected equipment. If the alignment is off, it can cause uneven stress on the gears and bearings, leading to premature failure.
There are different methods to ensure alignment. You can use laser alignment tools, which are quite accurate. These tools project a laser beam that helps you line up the shafts precisely. Another method is using dial indicators, which measure the run - out and misalignment of the shafts.
3. Mounting Surface
The mounting surface also plays a key role. It needs to be flat, clean, and strong enough to support the weight of the reducer and the load it'll be carrying. A rough or uneven mounting surface can cause vibrations, which can again damage the reducer.
Before mounting the reducer, make sure to clean the surface thoroughly to remove any dirt, debris, or rust. You might also want to use shims to adjust the height and level of the reducer if needed.
Optimal Installation Positions
Horizontal Installation
Horizontal installation is one of the most common positions. In this position, the input and output shafts are parallel to the ground. It's a good option when there's plenty of horizontal space available.
One advantage of horizontal installation is that it's easier to align the shafts. Also, the oil circulation is generally better, as gravity helps the oil flow through the gears and bearings. However, you need to make sure that the mounting surface is level, or else the oil might not distribute evenly.
Vertical Installation
Vertical installation can be a great choice when space is limited horizontally. In this position, the input and output shafts are perpendicular to the ground.
When installing vertically, you need to pay extra attention to the oil seals. Since the oil is more likely to leak out due to gravity, high - quality seals are a must. You might also need to use special oil additives to ensure proper lubrication in the vertical position.
Inclined Installation
In some cases, an inclined installation might be necessary. This could be due to the design of the equipment or the layout of the workspace. When installing at an angle, you need to consider the effect of gravity on the oil flow and the alignment of the shafts.
You'll need to adjust the oil level and the lubrication system accordingly. It's also important to check the alignment more frequently, as the inclined position can put additional stress on the components.
Installation Process
Step 1: Preparation
Before you start the installation, gather all the necessary tools and equipment. This includes wrenches, screwdrivers, alignment tools, and lubricants. Make sure you have the installation manual handy, as it'll provide specific instructions for your particular reducer model.
Step 2: Mounting the Reducer
Place the reducer on the mounting surface and secure it using the appropriate bolts. Tighten the bolts gradually and evenly to ensure a proper fit. Check the alignment of the shafts during this process.
Step 3: Connecting the Shafts
Once the reducer is mounted, connect the input and output shafts to the corresponding shafts of the connected equipment. Use coupling devices to make the connection. Make sure to follow the manufacturer's instructions for installing the couplings.


Step 4: Lubrication
Fill the reducer with the recommended lubricant. The type and amount of lubricant will depend on the model and the application. Check the oil level regularly and top it up as needed.
Step 5: Testing
After the installation is complete, run a test to make sure everything is working properly. Listen for any unusual noises or vibrations. Check the temperature of the reducer during operation to ensure that it's not overheating.
Conclusion
Optimizing the installation position of a right angle reducer is a critical step to ensure its long - term performance and reliability. By considering factors like space constraints, alignment, and mounting surface, you can choose the best installation position for your specific application.
Whether it's a horizontal, vertical, or inclined installation, following the proper installation process is key. And remember, if you have any questions or need more advice, don't hesitate to reach out. We're here to help you get the most out of your right angle reducer.
If you're in the market for a high - quality right angle reducer, or if you need help with installation or maintenance, feel free to contact us for a purchase negotiation. We've got a wide range of products, including the Gear Head Speed Reducer and the Hollow Solid Shaft Right Angle Reducer, to meet your needs.
References
- "Mechanical Power Transmission Handbook" by Norman L. Ensign
- "Reducer Installation and Maintenance Guide" by industry - standard manufacturers' manuals


