


Hey there! I'm working with a right angle reducer supply business, and I know that installing a right angle reducer in a limited space can be a real headache. But don't worry! I'm here to share some tips and tricks that'll make the process a whole lot easier.
First off, let's talk about why you might need a right angle reducer in a tight spot. Maybe you're working on a compact machine or a piece of equipment where space is at a premium. Right angle reducers are super useful in these situations because they can change the direction of the drive shaft, allowing you to fit the power transmission components into a smaller area.
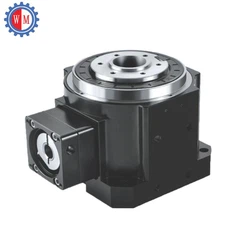
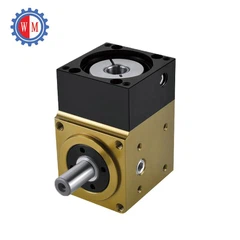
So, how do you choose the right right angle reducer for your limited - space application? Well, the first thing you need to consider is the size. You'll want to look for a reducer that's as compact as possible. For example, our Hollow Solid Shaft Right Angle Reducer is a great option. It's designed to be space - efficient while still delivering reliable performance.
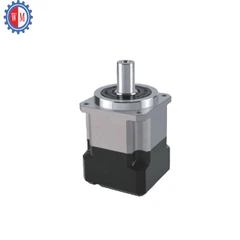
Another important factor is the type of gearing. There are different types of gears used in right angle reducers, like bevel gears and worm gears. Bevel gears are great for high - speed applications and can provide smooth operation. On the other hand, worm gears are known for their high reduction ratios and self - locking capabilities, which can be handy in some limited - space setups. Our Gear Head Speed Reducer offers a variety of gearing options to suit different needs.
Once you've picked the right reducer, it's time to start the installation process. The first step is to prepare the mounting surface. Make sure it's clean, flat, and free of any debris or burrs. You don't want any unevenness that could cause the reducer to vibrate or not sit properly.
Next, you'll need to align the input and output shafts. This is crucial for the smooth operation of the reducer. Use a dial indicator or other alignment tools to ensure that the shafts are perfectly aligned. Even a small misalignment can lead to premature wear and tear on the gears and bearings.
When it comes to actually mounting the reducer, you'll want to use the appropriate hardware. Make sure the bolts are tightened to the correct torque specification. Over - tightening can damage the reducer, while under - tightening can cause it to come loose during operation.
In a limited - space installation, you might also have to deal with cable management. You don't want the cables to get in the way or cause any interference. Try to route the cables neatly and secure them with cable ties or clips.
Now, let's talk about some common challenges you might face during the installation. One of the biggest issues is access. In a tight space, it can be difficult to get your hands in there to install and adjust the reducer. You might need to use some specialized tools, like right - angle screwdrivers or socket wrenches with extended handles.
Another challenge is heat dissipation. Right angle reducers generate heat during operation, and in a limited space, it can be harder for the heat to escape. Make sure there's enough ventilation around the reducer. You might even consider adding a heat sink or a cooling fan if necessary.


Maintenance is also important. Even though you've installed the reducer in a limited space, you still need to be able to access it for regular maintenance. Plan ahead and make sure there's enough room to check the oil level, change the filters, and perform any other necessary maintenance tasks.
Let's go through a step - by - step example of a limited - space installation. Say you're installing a right angle reducer in a small industrial machine.
- First, remove any components that are in the way of the installation area. This might include panels or covers.
- Clean the mounting surface thoroughly. Use a degreaser to remove any oil or grease.
- Place the reducer on the mounting surface and align it with the input and output shafts.
- Insert the mounting bolts and start tightening them gradually. Check the alignment again as you tighten the bolts.
- Connect the input and output shafts using the appropriate couplings. Make sure they're properly secured.
- Route the cables and secure them to prevent any interference.
- Double - check all the connections and make sure everything is tightened properly.
- Power on the machine and run a test to make sure the reducer is operating smoothly.
If you run into any problems during the installation, don't hesitate to reach out. We've got a team of experts who can provide you with technical support. We understand that every installation is unique, especially when it comes to limited - space applications.
In conclusion, installing a right angle reducer in a limited space is definitely a challenge, but with the right approach and the right product, it can be done successfully. We offer a wide range of right angle reducers that are designed to fit into tight spaces without sacrificing performance.
If you're interested in purchasing a right angle reducer for your limited - space project, or if you have any questions about the installation process, feel free to get in touch. We're here to help you find the best solution for your needs. Whether you're a small business owner or a large - scale manufacturer, we've got the products and expertise to support you.
References:
- Industry standards for right angle reducer installation
- Manufacturer's manuals for right angle reducers
- Technical papers on power transmission in limited - space applications


